


How To Deploy A Next.js App Using Spring Boot
Learn how to easily deploy Next.js static assets using Spring Boot


Next.js is now my favourite way to build front-end applications. With Next.js you can develop a full stack application, including your own API, however, sometimes you want to serve the front end by adding static assets to a backend application.
In this guide, we will learn how to serve Next.js static assets from a Spring Boot application.
How we usually deploy Next.js applications
Before we walk through how to serve Next.js assets from Spring Boot we should first understand how Next.js applications are usually deployed.
When we want to deploy a Next.js application we must first run next build to build the application. As described in the official documentation here, this produces:
HTML files for pages using getStaticProps or Automatic Static Optimization
CSS files for global styles or for individually scoped styles
JavaScript for pre-rendering dynamic content from the Next.js server
JavaScript for interactivity on the client-side through React
We must then run next start. This spins up a Node.js server that handles everything for us, including serving the static assets, handling API endpoints, routing, etc.
This is the recommended way to deploy Next.js applications however, in some cases, we don't want to have a separate server for our front end if we're already implementing back-end functionality in a different place, especially if we're not using Node.js.
In the next section, we'll explore how to serve our Next.js application using Spring Boot, without requiring a Node.js server.
Deploying a Next.js application using Spring Boot
The easiest way to explain how to do this is through a demo. In this section, I'll walk through a step-by-step guide.
Setting up
First, let's create a folder called spring-boot-nextjs-demo:
mkdir spring-boot-nextjs-demo
cd spring-boot-nextjs-demo
Then we'll create a Spring Boot application using the Spring Initializr tool.
You can create the project with all of the required tools using the link here. Click "GENERATE" and extract the zip to the spring-boot-nextjs-demo folder.
Next, let's create the Next.js app. Make sure you're in the spring-boot-nextjs-demo folder and run:
npx create-next-app@latest --ts
Call the app nextjs-app and follow the rest of the defaults.

Setting up the Maven modules
In this project we will have the following Maven structure:
a parent Maven project called
spring-boot-nextjs-demoa child module called
nextjs-app, which is responsible for building the Next.js applicationa child module called
spring-boot-app, which is responsible for building our Spring Boot application and adding our Next.js assets to the jar.
Parent Maven setup
We'll create a pom.xml file in the root folder, spring-boot-nextjs-demo, which contains the following:
<?xml version="1.0" encoding="UTF-8"?>
<project xmlns="http://maven.apache.org/POM/4.0.0" xmlns:xsi="http://www.w3.org/2001/XMLSchema-instance"
    xsi:schemaLocation="http://maven.apache.org/POM/4.0.0 https://maven.apache.org/xsd/maven-4.0.0.xsd">
    <modelVersion>4.0.0</modelVersion>
    <parent>
        <groupId>org.springframework.boot</groupId>
        <artifactId>spring-boot-starter-parent</artifactId>
        <version>3.0.0</version>
        <relativePath/> <!-- lookup parent from repository -->
    </parent>
    <groupId>com.stacktobasics</groupId>
    <artifactId>spring-boot-nextjs-demo</artifactId>
    <version>0.0.1-SNAPSHOT</version>
    <packaging>pom</packaging>
    <name>Spring Boot Nextjs Demo</name>
    <modules>
        <module>nextjs-app</module>
        <module>spring-boot-app</module>
    </modules>
    <properties>
        <java.version>17</java.version>
    </properties>

</project>
This quite simply inherits from the Spring Boot parent pom (as is usually the case for Spring Boot applications) and declares two child modules: our Next.js app and our Spring Boot app.
Next.js Maven setup
We'll create a pom.xml file in our nextjs-app folder, which contains the following:
<?xml version="1.0" encoding="UTF-8"?>
<project xmlns="http://maven.apache.org/POM/4.0.0" xmlns:xsi="http://www.w3.org/2001/XMLSchema-instance"
    xsi:schemaLocation="http://maven.apache.org/POM/4.0.0 http://maven.apache.org/xsd/maven-4.0.0.xsd">
    <parent>
        <artifactId>spring-boot-nextjs-demo</artifactId>
        <groupId>com.stacktobasics</groupId>
        <version>0.0.1-SNAPSHOT</version>
    </parent>
    <modelVersion>4.0.0</modelVersion>

    <artifactId>nextjs-app</artifactId>

    <build>
        <plugins>
            <plugin>
                <groupId>com.github.eirslett</groupId>
                <artifactId>frontend-maven-plugin</artifactId>
                <version>1.11.3</version>
                <executions>
                    <execution>
                        <id>install node and npm</id>
                        <goals>
                            <goal>install-node-and-npm</goal>
                        </goals>
                    </execution>
                    <execution>
                        <id>npm install</id>
                        <goals>
                            <goal>npm</goal>
                        </goals>
                        <phase>generate-resources</phase>
                    </execution>
                    <execution>
                        <id>npm run build</id>
                        <goals>
                            <goal>npm</goal>
                        </goals>
                        <phase>generate-resources</phase>
                        <configuration>
                            <arguments>run build</arguments>
                        </configuration>
                    </execution>
                </executions>
                <configuration>
                    <nodeVersion>v18.14.0</nodeVersion>
                </configuration>
            </plugin>
        </plugins>
    </build>

</project>
In this maven module we're including the frontend-maven-plugin.
When this module is built this plugin will run the execution steps that we've defined, npm install and npm run build in this case.
If we look in the package.json file generated by Next.js we'll see that npm run build runs next build, which generates all the files required for a production build in the out folder.
Spring Boot Maven setup
Next, let's edit the pom.xml file in the spring-boot-app folder to inherit from our new parent pom, and also to include our Next.js static assets in our Spring Boot application jar. The final pom.xml file will look like this:
<?xml version="1.0" encoding="UTF-8"?>
<project xmlns="http://maven.apache.org/POM/4.0.0" xmlns:xsi="http://www.w3.org/2001/XMLSchema-instance"
    xsi:schemaLocation="http://maven.apache.org/POM/4.0.0 https://maven.apache.org/xsd/maven-4.0.0.xsd">
    <modelVersion>4.0.0</modelVersion>

    <!-- Change parent tag from spring-boot-starter-parent to spring-boot-nextjs-demo -->
    <parent>
        <groupId>com.stacktobasics</groupId>
        <artifactId>spring-boot-nextjs-demo</artifactId>
        <version>0.0.1-SNAPSHOT</version>
    </parent>
    <groupId>com.stacktobasics</groupId>
    <artifactId>spring-boot-app</artifactId>
    <version>0.0.1-SNAPSHOT</version>
    <name>spring-boot-app</name>
    <description>Demo project for Spring Boot that serves Next.js assets</description>
    <properties>
        <java.version>17</java.version>
    </properties>
    <dependencies>
        <dependency>
            <groupId>org.springframework.boot</groupId>
            <artifactId>spring-boot-starter-web</artifactId>
        </dependency>

        <dependency>
            <groupId>org.springframework.boot</groupId>
            <artifactId>spring-boot-starter-test</artifactId>
            <scope>test</scope>
        </dependency>
    </dependencies>

    <build>
        <plugins>
            <plugin>
                <groupId>org.springframework.boot</groupId>
                <artifactId>spring-boot-maven-plugin</artifactId>
            </plugin>
            <plugin>
                <artifactId>maven-resources-plugin</artifactId>
                <version>3.2.0</version>
                <executions>
                    <execution>
                        <id>copy-resources</id>
                        <phase>generate-resources</phase>
                        <goals>
                            <goal>copy-resources</goal>
                        </goals>
                        <configuration>
                            <outputDirectory>${basedir}/target/classes/static</outputDirectory>
                            <resources>
                                <resource>
                                    <directory>${basedir}/../nextjs-app/out</directory>
                                    <filtering>false</filtering>
                                </resource>
                            </resources>
                        </configuration>
                    </execution>
                </executions>
            </plugin>
        </plugins>
    </build>

</project>
Then maven-resources-plugin will copy our Next.js static assets created by our Next.js maven module, into the static folder in our jar.
Enable static export
Finally, we need to enable the exporting of our Next.js application to HTML. To do this, edit the build script in package.json to include next export:
"scripts": {
    "dev": "next dev",
    "build": "next build && next export",
    "start": "next start",
    "lint": "next lint"
},
Now, let's build the application!
Note: If you don't have Maven installed then copy the .mvn folder and the mvnw file (or mvnw.cmd file if you're on windows) to the root directory, spring-boot-nextjs-demo.
From the root directory, run mvnw clean install.
Oops! The build failed!
You will see something like:
[INFO] info  - using build directory: D:\Documents\Development\spring-boot-nextjs-demo\nextjs-app\.next
[INFO] info  - Copying "static build" directory
[INFO] info  - No "exportPathMap" found in "D:\Documents\Development\spring-boot-nextjs-demo\nextjs-app\next.con
fig.js". Generating map from "./pages"
[INFO] Error: Image Optimization using Next.js' default loader is not compatible with `next export`.
[INFO]   Possible solutions:
[INFO]     - Use `next start` to run a server, which includes the Image Optimization API.
[INFO]     - Configure `images.unoptimized = true` in `next.config.js` to disable the Image Optimization API.
[INFO]   Read more: https://nextjs.org/docs/messages/export-image-api
[INFO]     at D:\Documents\Development\spring-boot-nextjs-demo\nextjs-app\node_modules\next\dist\export\index.js
:153:23
[INFO]     at async Span.traceAsyncFn (D:\Documents\Development\spring-boot-nextjs-demo\nextjs-app\node_modules\
next\dist\trace\trace.js:79:20)
[INFO] ------------------------------------------------------------------------
[INFO] Reactor Summary for Spring Boot Nextjs Demo 0.0.1-SNAPSHOT:
[INFO]
[INFO] Spring Boot Nextjs Demo ............................ SUCCESS [  0.406 s]
[INFO] nextjs-app ......................................... FAILURE [ 17.515 s]
[INFO] spring-boot-app .................................... SKIPPED
[INFO] ------------------------------------------------------------------------
[INFO] BUILD FAILURE
[INFO] ------------------------------------------------------------------------
[INFO] Total time:  18.369 s
[INFO] Finished at: 2023-02-18T18:08:02Z
[INFO] ------------------------------------------------------------------------
[ERROR] Failed to execute goal com.github.eirslett:frontend-maven-plugin:1.11.3:npm (npm run build) on project n
extjs-app: Failed to run task: 'npm run build' failed. org.apache.commons.exec.ExecuteException: Process exited
with an error: 1 (Exit value: 1) -> [Help 1]
Disabling Next.js' server-side features
The reason we see this error is that there are limitations when using next export. We'll cover this in more detail in the next section, but for now, change your next.config.js file in nextjs-app to the following:
/** @type {import('next').NextConfig} */
const nextConfig = {
  reactStrictMode: true,
  images: {
    unoptimized: true
  },
}

module.exports = nextConfig
Now let's run our build again using mvnw clean install
Hopefully, by the end of the build, you should see:
[INFO] ------------------------------------------------------------------------
[INFO] Reactor Summary for Spring Boot Nextjs Demo 0.0.1-SNAPSHOT:
[INFO]
[INFO] Spring Boot Nextjs Demo ............................ SUCCESS [  0.355 s]
[INFO] nextjs-app ......................................... SUCCESS [01:39 min]
[INFO] spring-boot-app .................................... SUCCESS [  8.813 s]
[INFO] ------------------------------------------------------------------------
[INFO] BUILD SUCCESS
[INFO] ------------------------------------------------------------------------
[INFO] Total time:  01:49 min
[INFO] Finished at: 2023-02-18T18:02:11Z
[INFO] ------------------------------------------------------------------------
Let's test our spring boot app to see if it's rendering our Next.js static assets.
Run java -jar spring-boot-app/target/spring-boot-app-0.0.1-SNAPSHOT.jar.
Once you see c.s.s.SpringBootAppApplication : Started SpringBootAppApplication in 2.334 seconds (process running for 2.847) go to http://localhost:8080/.
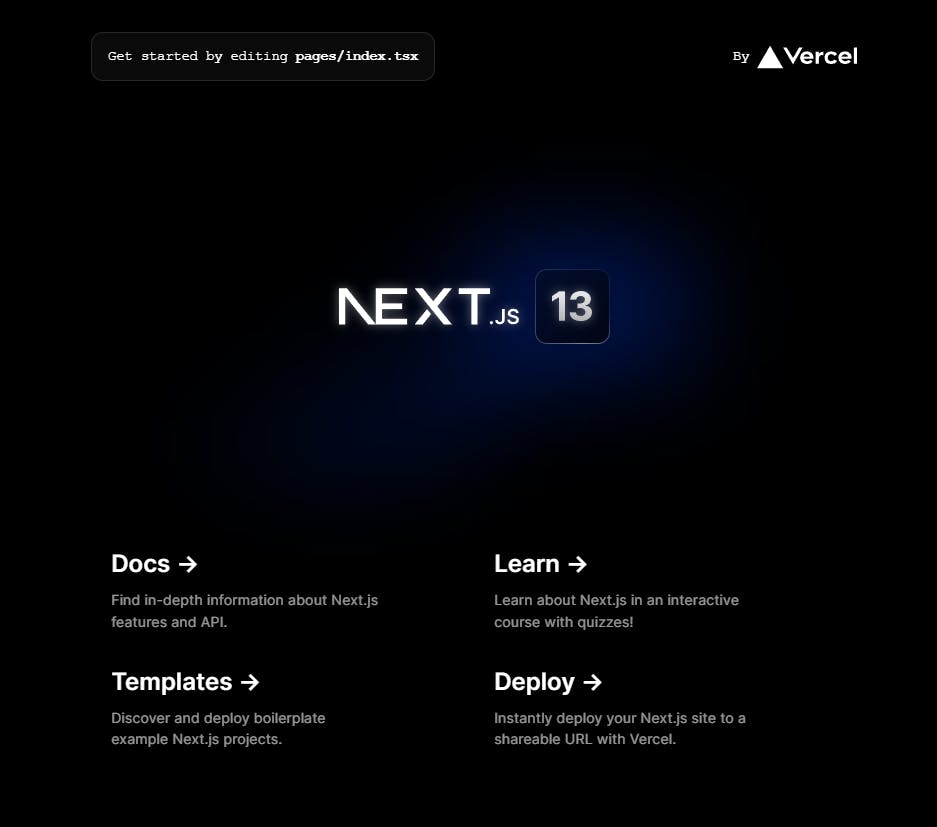
You should see the generated HTML from the index.tsx page:
Adding an Endpoint to our API
To make sure that we can reach both our API and our HTML pages let's add a simple controller.
Under spring-boot-app/src/main/java/com.stacktobasics.springbootapp add the following HelloController.java file:
package com.stacktobasics.springbootapp;

import org.springframework.web.bind.annotation.GetMapping;
import org.springframework.web.bind.annotation.RestController;

@RestController
public class HelloController {
    @GetMapping("/api/hello-world")
    public String sayHello() {
        return "Hello!";
    }
}
Let's rebuild and re-run our application.
Stop the java -jar process if you haven't already and run mvnw clean install, followed by java -jar spring-boot-app/target/spring-boot-app-0.0.1-SNAPSHOT.jar.
Once our Spring Boot app has started, going to http://localhost:8080/ will again show us the landing page.
Going to http://localhost:8080/api/hello-world will return Hello! as expected, proving that Spring Boot is still routing to our API correctly!
Adding another Next.js page
Lastly, let's check that we're able to navigate between different Next.js pages.
Add a new file called hello.tsx under the nextjs-app\pages folder with the following contents:
export default function Home() {
    return (
        <>
            Hello world!
        </>
    )
}
Next, we'll create a link to this page. Open the index.tsx file and import the next/link package:
import Link from "next/link";
Then, add a link to our new page at the bottom:
...
          <div>
            <Link href={"/hello"}>Go to hello page</Link>
          </div>
        </div>
      </main>
    </>
  )
}
Let's rebuild and re-run our application.
Stop the java -jar process if you haven't already and run mvnw clean install, followed by java -jar spring-boot-app/target/spring-boot-app-0.0.1-SNAPSHOT.jar.
We will now see a link to our Hello page at the bottom of the landing page:
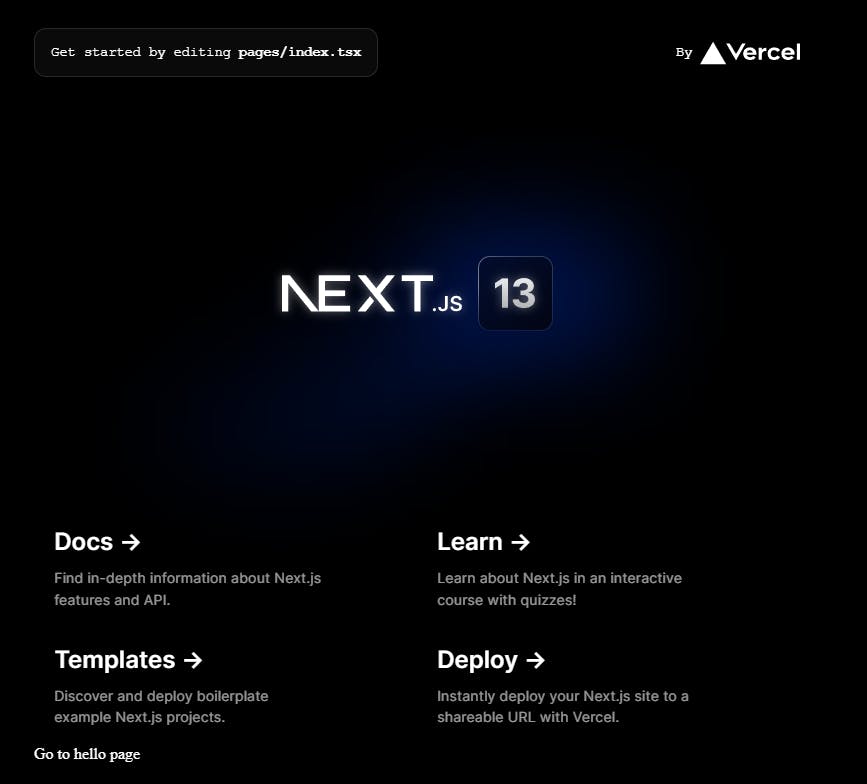
Clicking on this link will bring us to our new page:

However, try refreshing the page. You'll see a 404 error:

Huh? What happened?
Routing to pages without .html
When we clicked the link to go to our hello page from our index page the request to change to a different route was handled from the client side, which worked thanks to Next.js's routing.
However, when we navigate directly to /hello we're going straight to the server. Our server does not have a resource that maps to /hello, so it returns a 404.
We do however have a file called /hello.html. If you navigate to localhost:8080/hello.html you will see our hello page.
This isn't great though, we want users to be able to get to our /hello page directly, without the .html extension!
One easy way to do this is to add a Spring MVC controller (Note the use of @Controller, not @RestController!) to map any request which does not have a file extension to the corresponding HTML page.
Add a class called HtmlController containing the following:
package com.stacktobasics.springbootapp;

import org.slf4j.Logger;
import org.slf4j.LoggerFactory;
import org.springframework.stereotype.Controller;
import org.springframework.web.bind.annotation.PathVariable;
import org.springframework.web.bind.annotation.RequestMapping;

@Controller
public class HtmlController {

    Logger logger = LoggerFactory.getLogger(HtmlController.class);

    @RequestMapping("/{page:^(?!.*[.].*$).*$}")
    public String requestPage(@PathVariable("page") String page) {
        String htmlPage = "/"+page+".html";
        logger.info("forwarding request to {}", htmlPage);
        return htmlPage;
    }
}
Let's rebuild and re-run our application.
Stop the java -jar process if you haven't already and run mvnw clean install, followed by java -jar spring-boot-app/target/spring-boot-app-0.0.1-SNAPSHOT.jar.
Now going to localhost:8080/hello will correctly render our hello page.
We also see the following log, showing that our HtmlController is working:[nio-8080-exec-2] c.s.springbootapp.HtmlController : forwarding request to /hello.html
Making local development easier
Whilst what we've done above works well for generating a production build it's quite cumbersome for local development.
Instead, I would recommend using next dev for local development and starting your Spring Boot app in the usual way - such as from an IDE like IntelliJ.
Let's test this out!
Run npm run dev (which runs next dev) from the nextjs-app folder and verify that you can load both localhost:3000 and localhost:3000/hello.
Start up your Spring Boot app from your IDE.
You might have guessed a problem we will face with this approach (hint: it's related to port numbers!).
When we've built our application using maven and running java -jar then both our API and our front-end assets are being served from our Spring Boot application on port 8080.
However, when using next dev the front end will be served from Node.js on port 3000.
This can be problematic when making calls to our back-end service from our front-end application.
Let's show this issue with an example.
Firstly, stop both your Next.js and Spring Boot processes.
Secondly, change your hello.tsx file to make a call to the api/hello-world endpoint, like so:
import { useState, useEffect } from 'react'
export default function Home() {

    const [helloResponse, setHelloResponse] = useState<string|null>(null)

    useEffect(() => {
        fetch('/api/hello-world')
            .then((res) => res.text())
            .then((data) => {
                setHelloResponse(data)
            })
    }, [])

    return (
        <>
            Hello world!
            Response from server call to /api/hello-world: {helloResponse}
        </>
    )
}
Run mvnw clean install, followed by java -jar spring-boot-app/target/spring-boot-app-0.0.1-SNAPSHOT.jar.
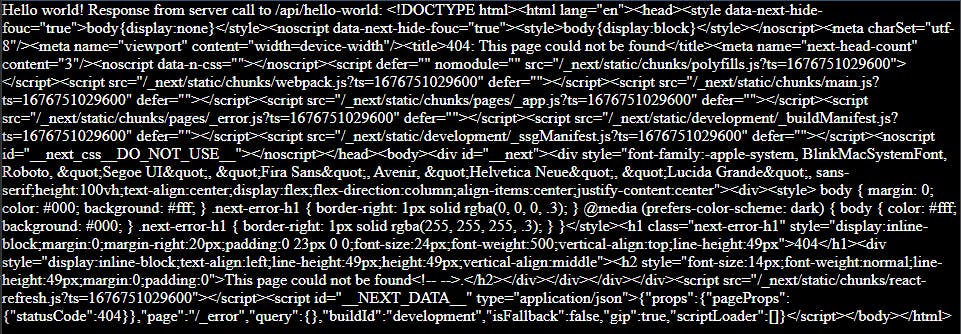
Then navigate to localhost:8080/hello. This will show the following:

We can see the response is returned from our /api/hello-world call, as expected.
This time, stop your java -jar process, and run your Next.js app using npm run dev and your Spring Boot app from your IDE.
Navigate again to localhost:8080/hello.
This time you'll see an error:
The reason we see this error is that your request is going to localhost:3000/api/hello-world, rather than localhost:8080/api/hello-world.
We can get around this by using Rewrites. To do this we must change our next.config.js file to the following:
/** @type {import('next').NextConfig} */
const nextConfig = {
    reactStrictMode: true,
    images: {
        unoptimized: true
    },
    async rewrites() {
        return [
            {
                source: '/api/:path*',
                destination: 'http://localhost:8080/api/:path*',
            },
        ]
    }
}

module.exports = nextConfig
Here we've added config to rewrite every request matching /api/** to http://localhost:8080/api/**.
Restart the Node server by re-running npm run dev.
You'll now see that navigating to localhost:3000/hello renders the data from localhost:8080/api/hello-world
Limitations of hosting Next.js static assets from Spring Boot
We touched on the limitations of next export briefly when we had to change our next.config.js file to specify that images should not be optimised.
Next.js has a lot of features - some that work on the server-side and some that work on the client-side. When we run next export we no longer have the Node.js server, and thus we can't take advantage of the server-side features of Next.js that rely on a dedicated Node.js server.
It's worth keeping this in mind as there may be features that you want to use that are server-side features. The following features are not supported:
Image Optimization (default loader)
Internationalized Routing
API Routes
Rewrites
Redirects
Headers
Middleware
Incremental Static Regeneration
fallback: true
getServerSideProps
More on this can be read in the official documentation here.
Conclusion
In this post, we have learned how to generate static assets for Next.js and serve them with a Spring Boot back-end application.
We have learned about some of the common pitfalls of this approach and found ways to get around them.
We have also learned the best way to do local development when using this approach by using Next.js Rewrites.
Finally, we have learned about some of the limitations of using the Export feature in Next.js.
All of the code from this post can be found here.
Till next time!