

Creating a Project Using Public Data for Fun and Profit: Part 4
How to use public data to build a Next.js app to help you land your next job, and maybe make some money - part 4


This blog is part 4 of "Creating a Project Using Public Data for Fun and Profit".
Previous posts:
In this part, we will cover:
Adding support for Twitter and Facebook cards
Measuring website performance using Google Analytics
Measuring SEO using Google Search Console
Monitising our website using Google AdSense
All the code referenced in this post can be found in my repo here. As well, you can find a live version of the application we build here.
Adding Social Media Support
Adding social media support is a great way to improve the appearance of your website when shared on social media platforms. The tags provided in the sections below will add a card preview on Twitter and Facebook, which will contain a title, description, and image.
To add Twitter support, add the following tags to _app.tsx in <Head>:
<meta name="twitter:card" content="summary" />
<meta name="twitter:url" content="https://public-data-demo.vercel.app" />
<meta name="twitter:title" content="Best Driving Test Pass Rates Near Me" />
<meta name="twitter:description" content="Give yourself the best opportunity to pass your driving test. Find the driving test centre that has the best pass rate near you. Find in locations such as Manchester, London, Birmingham, Newcastle, Leeds, Wales, Scotland, anywhere in the UK." />
<meta name="twitter:image" content="https://public-data-demo.vercel.app/icon-512x512.png" />
<meta name="twitter:creator" content="@shanepjennings" />
Make sure to change the URL, image, and creator tags to reflect your own!
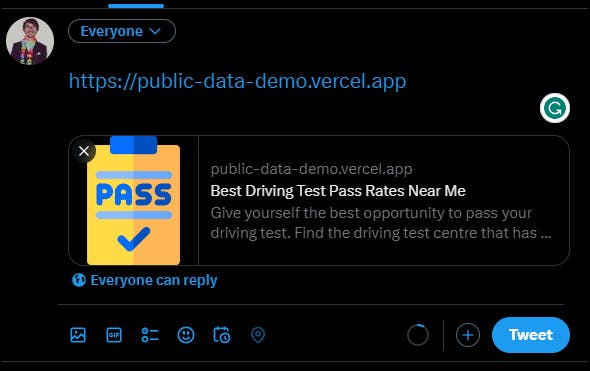
Using a link to your website in a tweet will now show a card, like this:
To add Facebook support, add the following tags to _app.tsx in <Head>:
<meta property="og:type" content="website" />
<meta property="og:title" content="Best Driving Test Pass Rates Near Me" />
<meta property="og:description" content="Give yourself the best opportunity to pass your driving test. Find the driving test centre that has the best pass rate near you. Find in locations such as Manchester, London, Birmingham, Newcastle, Leeds, Wales, Scotland, anywhere in the UK." />
<meta property="og:url" content="https://public-data-demo.vercel.app" />
<meta property="og:image" content="https://public-data-demo.vercel.app/icon-512x512.png" />
Again, make sure to change the URL and image tags to reflect your own!
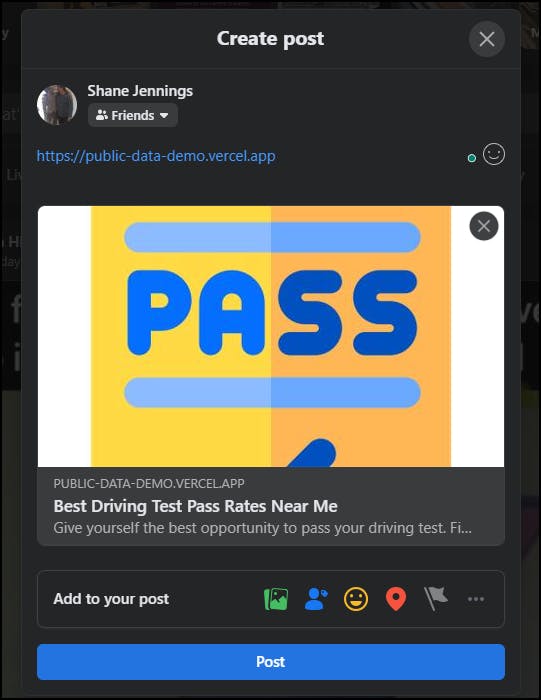
Using a link to your website in a Facebook post will now show a card, like this:
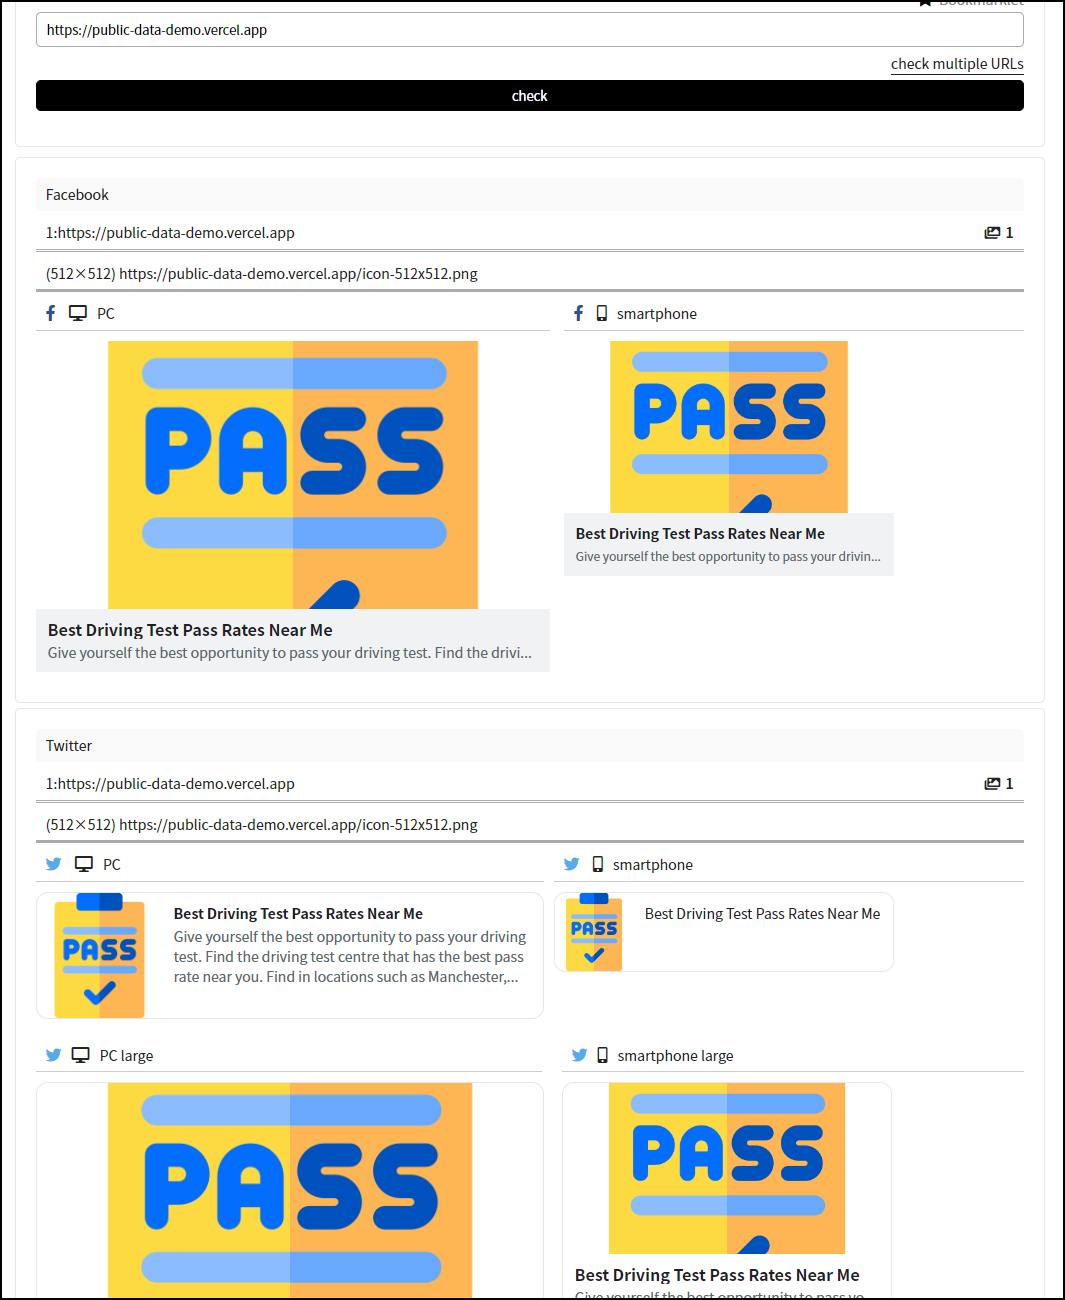
To test how your website will appear on various social media platforms from various devices, you can use the Open Graph Simulator. Simply enter your website URL and you'll be shown how your website would appear on various platforms.
Performance
Your application is now live, great! But now you might be wondering, "How can I see if anyone is even using my website?".
This is where Google Analytics comes in. It's a powerful tool that allows you to measure your website's performance, track user behaviour, and gain insights that can help you improve your site.
Here we'll walk through how to get started with Google Analytics.
Step 1: Create an Account and Property
First, go to analytics.google.com and click the "Start measuring" button. This will prompt you to create an account and a property. If you're a single developer, you'll likely have one account to encompass all of your websites and a property per website.
Once you've created your property, you should be given a Measurement ID. If not, click on the Gear icon on the bottom left of the screen, click "Data Streams" under the property column, and select the "Web" tab.

Here, you'll find the Measurement ID.

Step 2: Add the Google Analytics Script to Your Website
To enable analytics collections for your website, you'll need to add the Google Analytics script. Go to _app.tsx and add the following code before the <Head> element:
<Script id="google-tag-manager" strategy="lazyOnload"
        src="https://www.googletagmanager.com/gtag/js?id=G-XXXXXX"/>
<Script id="google-analytics" strategy="lazyOnload">
  {`
                window.dataLayer = window.dataLayer || [];
                function gtag(){dataLayer.push(arguments);}
                gtag('js', new Date());

                gtag('config', 'G-XXXXXX', {
                    page_path: window.location.pathname,
                    });
            `}

</Script>
Make sure to replace the G-XXXXXX with your own Measurement ID.
Step 3: Start Tracking Your Website's Performance
Once you've added the Google Analytics script to your website, you can start tracking its performance. Visit your website a few times and click around on various pages. Eventually, you'll start seeing data in the Google Analytics console.
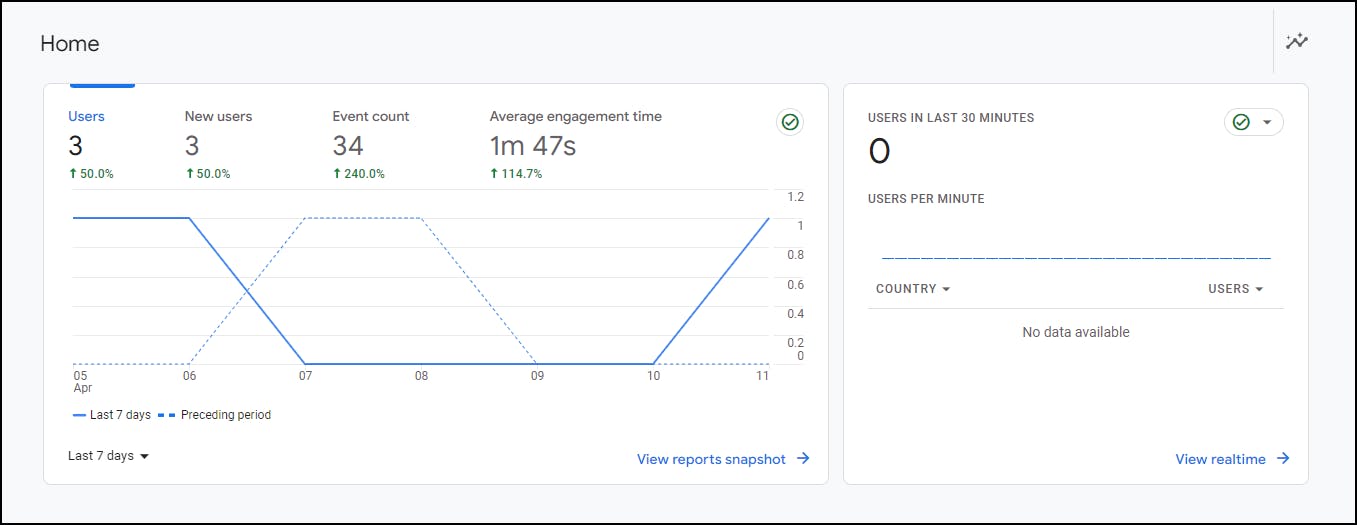
Google Analytics tracks a lot of useful information, such as the number of users who have visited your website, where they're from, which pages are the most popular, and much more. I recommend taking some time to explore the different reports and analytics to gain valuable insights that can help you improve your website.
And the best part? Google Analytics is free to use!
SEO
I've mentioned SEO a few times in this post, however, if you haven't heard of it before it stands for Search Engine Optimisation, and it's all about getting your website to show up in search engine results, like Google. The higher your website ranks in search results, the more likely people are to click on it. And if you're running a monetized website, good SEO can mean more income.
Next.js has an excellent introduction to SEO, which you can find here.
There are plenty of SEO tools out there, some free and some not. Some of these tools can help with keyword research, which can help you figure out which words to use on your website to improve your chances of showing up in search results. But in this section, we'll be focusing on Google Search Console, a free tool that I find particularly useful for SEO.
Google Search Console has two features that I find particularly helpful:
Indexing: You can see if Google has indexed pages from your website. Pages need to be indexed to show up in a Google search.
Performance: You can see how many times your website has appeared in Google searches, how many clicks it's received, what people searched for to find it, and more.
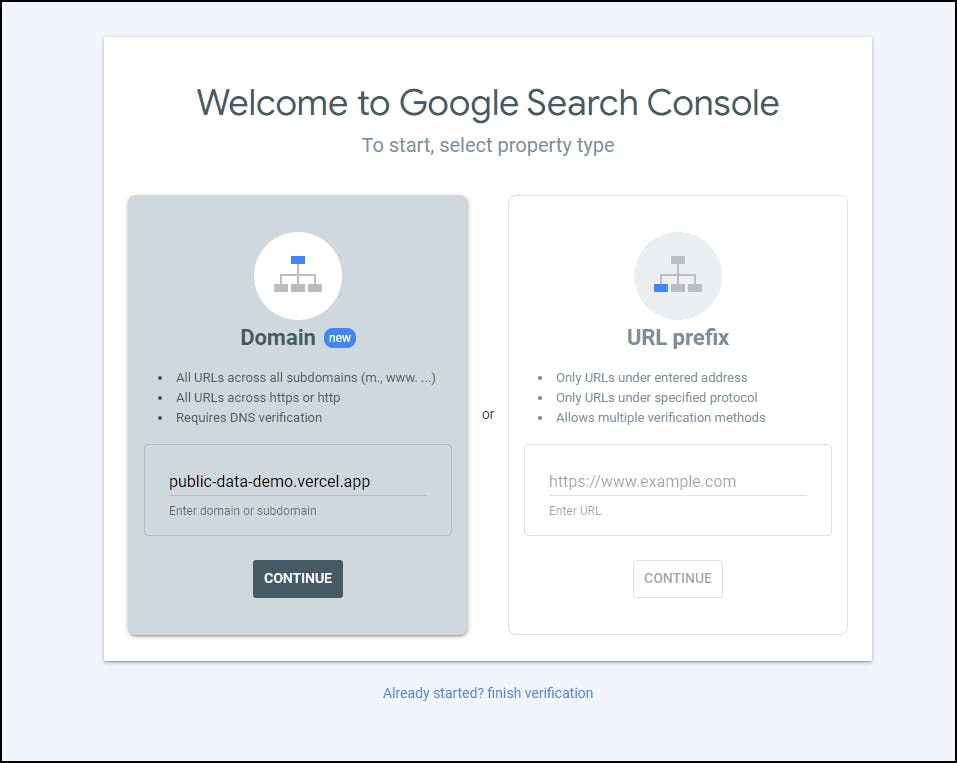
Step 1: Sign Up With Google Search Console
To get started with Google Search Console, go to search.google.com/search-console and enter your website's domain under the "Domain" box on the left. Then click "Continue."
Step 2: Verify Domain Ownership
You'll see a screen asking you to verify domain ownership, like this:
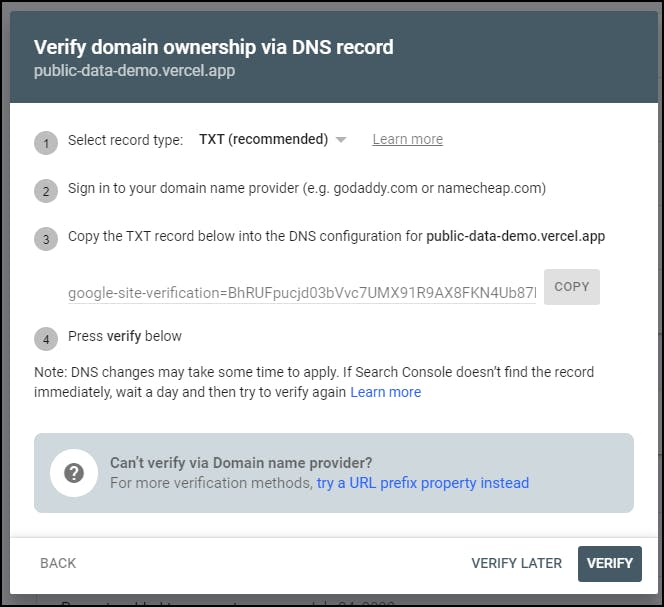
We need to complete this step before we can use Google Search Console. Unfortunately, we can't do this with the basic Vercel domain that we're using for free.
This step requires you to have purchased a domain in the previous step. The steps to verify domain ownership will vary depending on your domain provider.
If you purchased your domain through Google Domains, you can verify ownership by:
Opening your domain in Google Domains
Select "DNS" from the left-hand sidebar
Clicking "Manage custom records"
Clicking "Create new record"
Host name: leave blank
Type: A
TTL: Leave as default
Data: The text provided by Google Search console, starting with "google-site-verification="

Once you've created the custom record, click the "Verify" button in Google Search Console. It may take some time for the change to take effect, so you may need to check back later.
Indexing
Now, you might be wondering why you're not showing up on Google's search results yet. Well, the answer is simple: Google hasn't indexed your website yet.
First, let's talk about what indexing is. Google uses a "crawler" to find your website's robots.txt file. This file tells the crawler which URLs it can access to crawl. From there, the sitemap.xml file, which contains the locations of all of your static pages, is found. The crawler will then start indexing each of these pages.
It is important to note that this process can take months, especially if the website isn't appearing in a lot of Google search results. But there are ways to speed it up.
One way is to check if Google has found your sitemap.xml file. You can see this by clicking on "Sitemaps" on the left-hand sidebar. If your sitemap has been found then it will be listed there.

If your sitemap hasn't been found, you can speed up the process by submitting a link to your sitemap using the "Add a new sitemap" box. This will add the sitemap to the crawler's queue, increasing the likelihood that your website will be indexed sooner.
Once your sitemap has been discovered, Google will automatically start discovering pages on your website. In the screenshot above you'll see under the "Discovered pages" heading that 67 pages have been discovered on my website, drivingpassrate.co.uk.
Once you have some pages appearing you can dig into this deeper by clicking on "Pages" on the left-hand sidebar. This will show you which pages have been indexed and which have yet to be indexed.
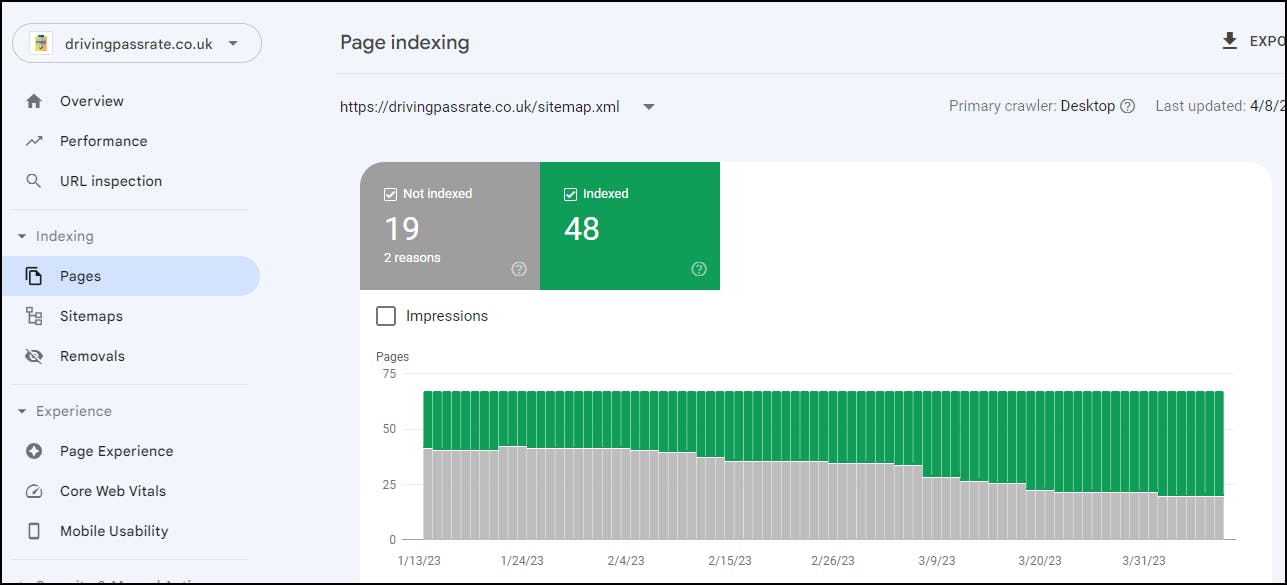
In the image above you can see how pages on my website have been indexed over time.
At the bottom of this page, we can see more details on why some pages have not been indexed.
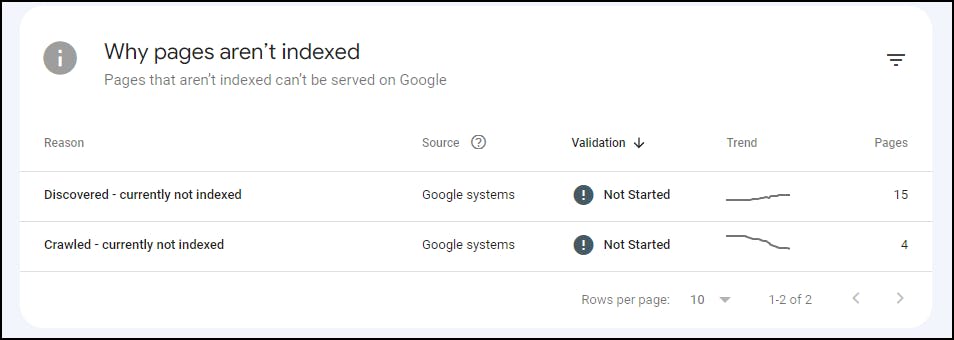
Here we can see that Google has:
discovered 15 pages (by using the sitemap) but has not yet crawled or indexed them
has crawled 4 pages but has not yet indexed them.
We can drill deeper again to see which pages haven't been indexed.
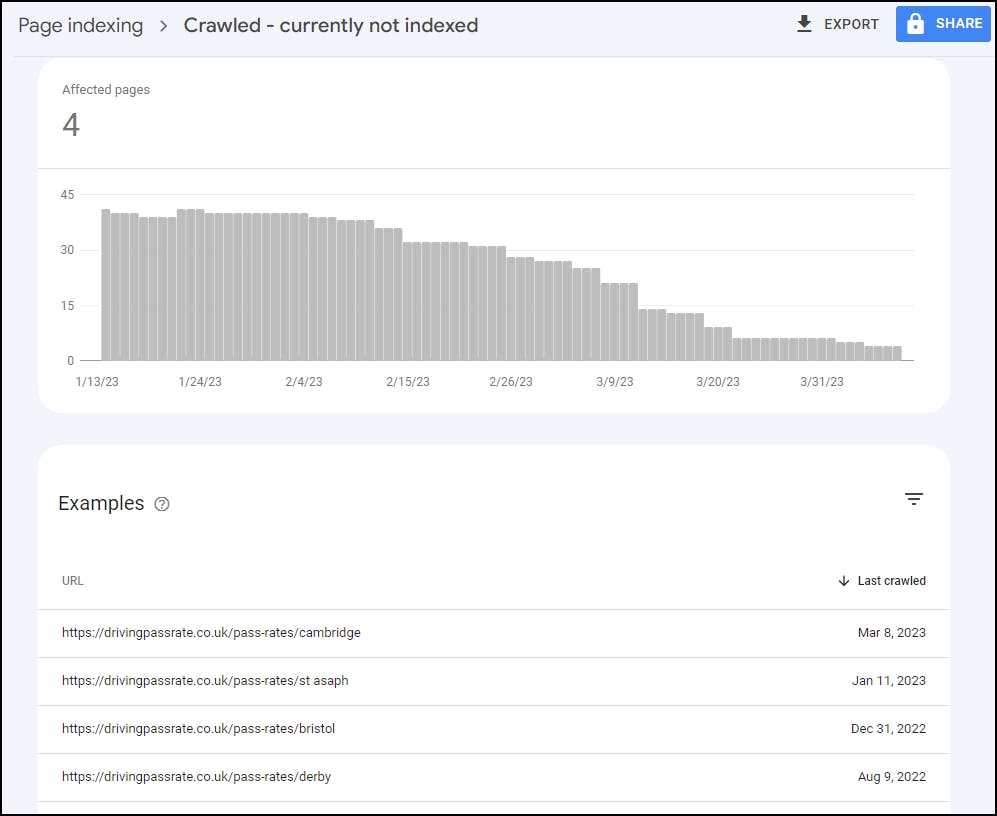
I mentioned that this process can take months, and you can see proof of that in the image above, where drivingpassrate.co.uk/pass-rates/derby was crawled in August last year but still hasn't been indexed.
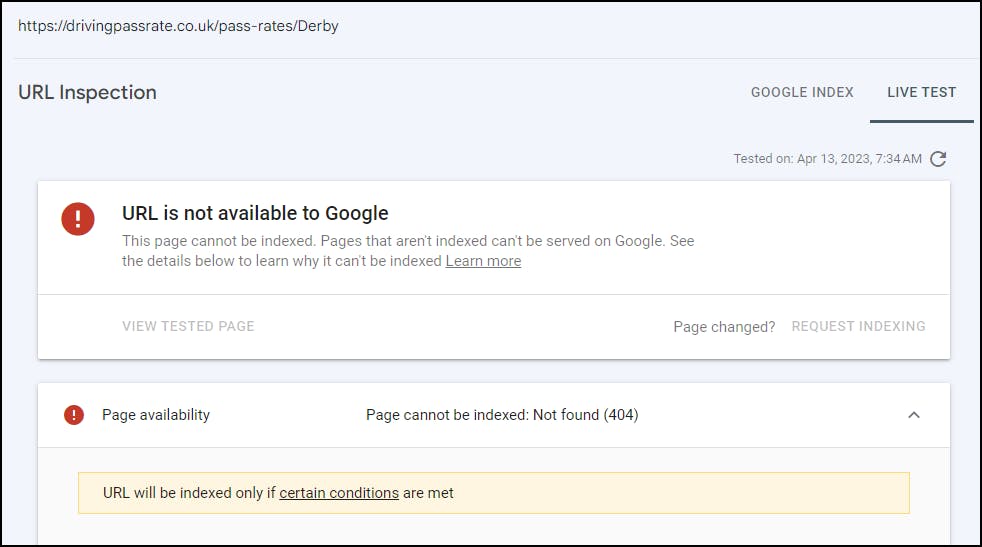
We can speed up this process by forcing our pages into Google's indexing queue. To do this, search for your page in the search bar at the top that says "Inspect any URL". Note that you need to search for the whole URL, including HTTPS. The search is also case-sensitive so make sure that is also correct.
Once you've searched for a page you can check that that page exists by clicking the "Test Live URL" button. If you've entered the wrong URL then you'll see "Page cannot be indexed: Not found (404)", like this:
If you've entered the correct URL then you should see "Page can be indexed", like this:
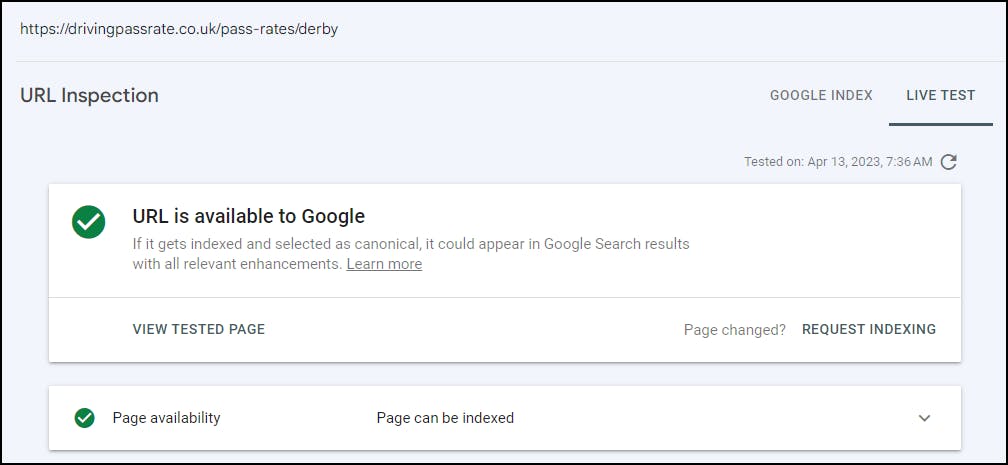
To force the page into the indexing queue click the "Request Indexing" button.

You should then see a popup stating that the URL was added to the queue. Note that it also says that submitting the same page multiple times will not change the queue position, so don't bother spamming the "Request Indexing" button!
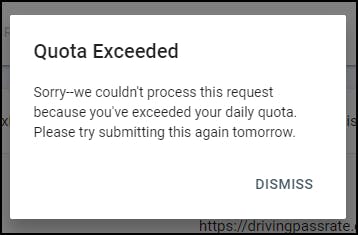
Keep in mind that even though your page has been added to the queue, it can still take a long time to be indexed. However, it will be faster than waiting for the crawler to automatically crawl it. Also, note that you can only request a small number of pages to be indexed at one time before your quota is exceeded (around 10 pages per day). So, be strategic in which pages you request to be indexed.
If you exceed this quota, you'll see this popup when trying to request indexing:
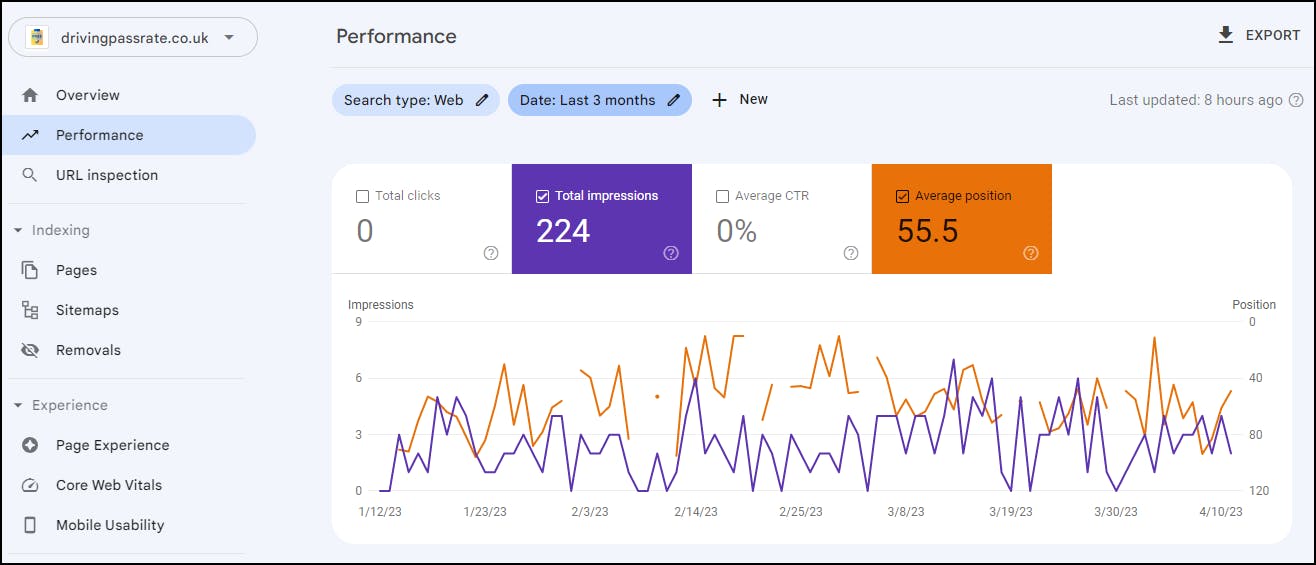
Performance
With this feature, you can see how many people have seen your results when searching in Google, how many people have clicked on your results, and what people were searching for when they saw your results.
To access this feature, simply click on "Performance" on the left-hand sidebar of the Search Console dashboard. You'll be presented with a graph that displays several metrics, including total clicks, total impressions, average click-through rate (CTR), and average position.
Scrolling down, you'll find a table that displays more detailed information, such as the queries people searched for, the pages that appeared in the search results, the countries people were searching from, the devices they used to search, and the dates your pages appeared in search results. Each result set displays the number of impressions and the position of your website in the search results.

To dive even deeper, you can click on any of these results to see the page that appeared in the search results, as well as other metrics such as country and device. With this information, you can better understand how your website is performing in search results and make improvements as needed.
For example, by clicking the top result "winchester pass rate" we can see the page that appeared in the search results, as well as all the other metrics such as country and device.

Keyword Research
When it comes to SEO, it's also important to consider keyword research. While Search Console can show you what keywords people searched for when your website appeared in search results, it can't tell you what similar keywords people searched for when your website did not appear in the results. This is where keyword research comes in.
There are free tools available, such as Ahrefs Keyword Generator, that can help you conduct keyword research. By typing in a number of keywords related to your website, you can find out what people are searching for related to those keywords. For example, if you search for the term "driving test centre pass rate," you might find that people are searching specifically for "Mill Hill driving test centre pass rate," with around 100 searches per month.
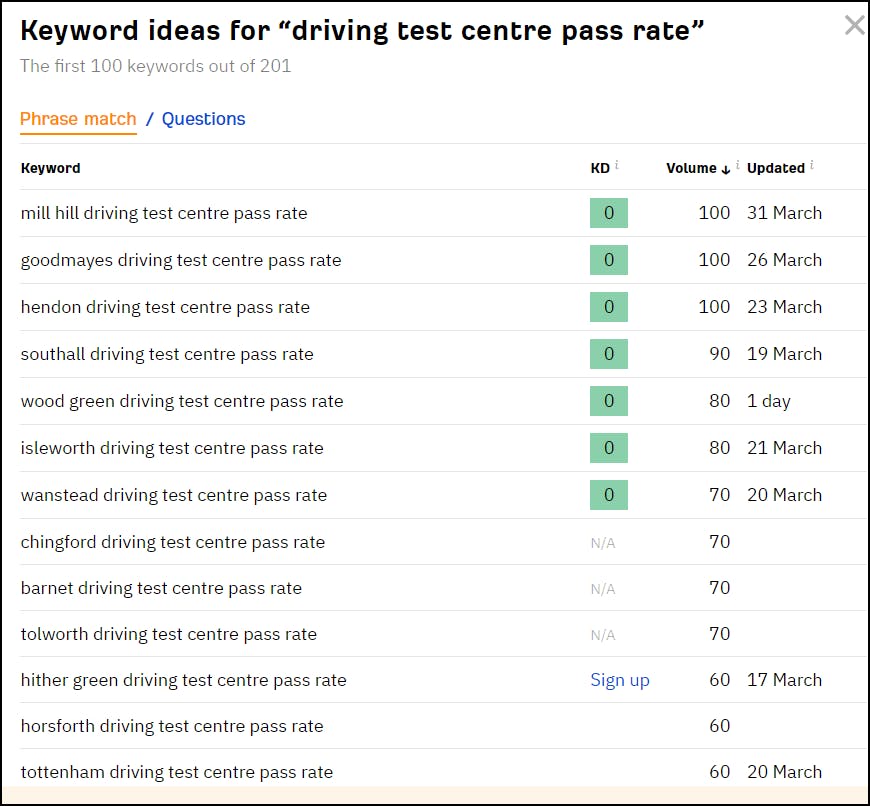
Armed with this information, you can optimize your website's content to target these keywords and improve your SEO.
Monitise your Website
There are numerous ways that you can earn income from a website, but one popular method is by adding ads. And Google AdSense is an easy and effective way to start earning some revenue.
Step 1: Sign Up with Google AdSense
To get started, simply head over to adsense.google.com/start/ and sign up. Once you have created an account, you can add your website to start displaying ads.
Step 2: Add the Script
After signing in, navigate to the "Sites" tab on the left sidebar, and click on "New site" to add your website. Once you've done that, you will see the code you need to add to your website to start showing ads.
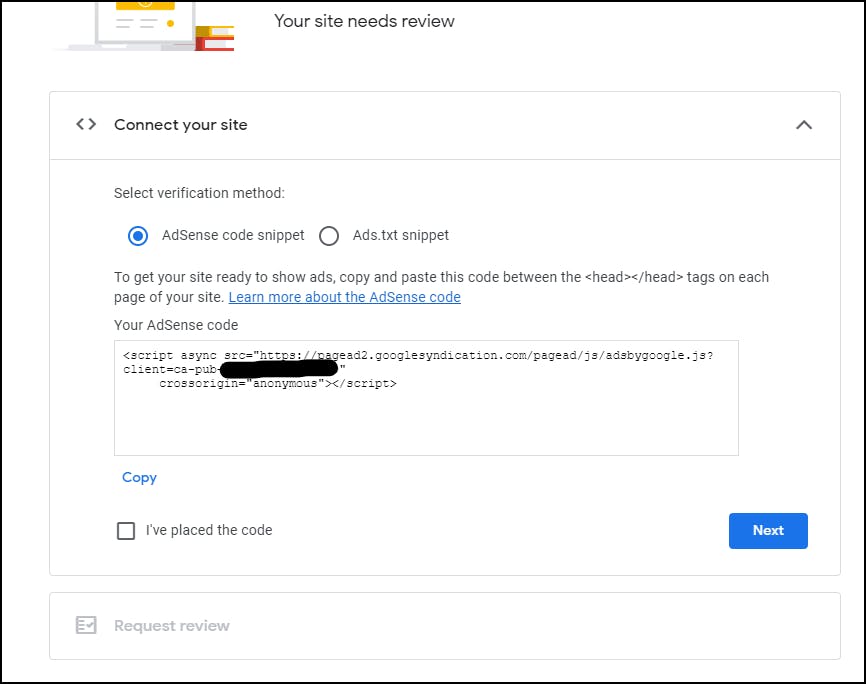
To add the code to your website, simply go to _app.tsx and add the following code just before the <Head> element:
<Script
src="https://pagead2.googlesyndication.com/pagead/js/adsbygoogle.js?client=ca-pub-XXXXX"
crossOrigin="anonymous"/>
Make sure to replace "ca-pub-XXXXX" with your own unique AdSense publisher ID.
Step 3: Enable Ads
After adding the code to your website, go back to the Google AdSense window and tick the "I've placed the code" option and click "Next." Next, click "Request review", so that your website will be reviewed for eligibility.
While waiting for the review process, you can decide on your ad placement. With Google AdSense, you have the option to let the system automatically place ads on your site or choose ad placements manually. In this post, we'll focus on the former option.
Navigate to the "Ads" tab on the left sidebar and click the pencil icon next to your website to edit its settings.
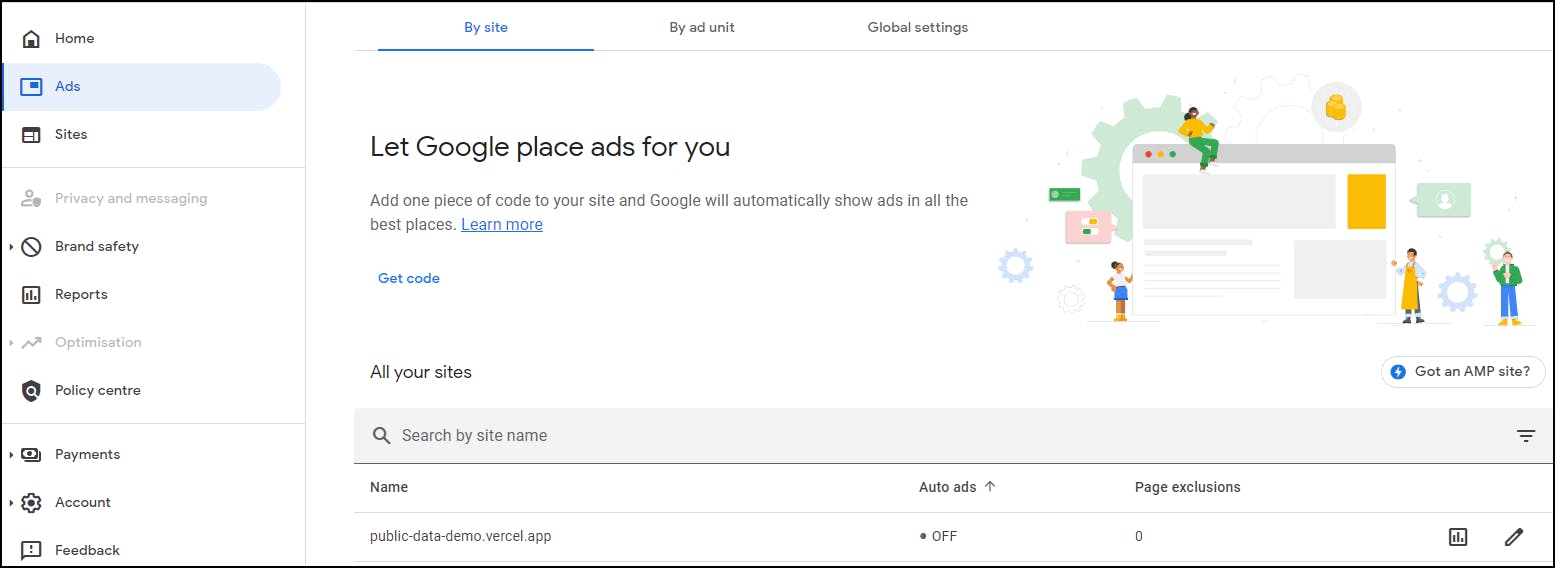
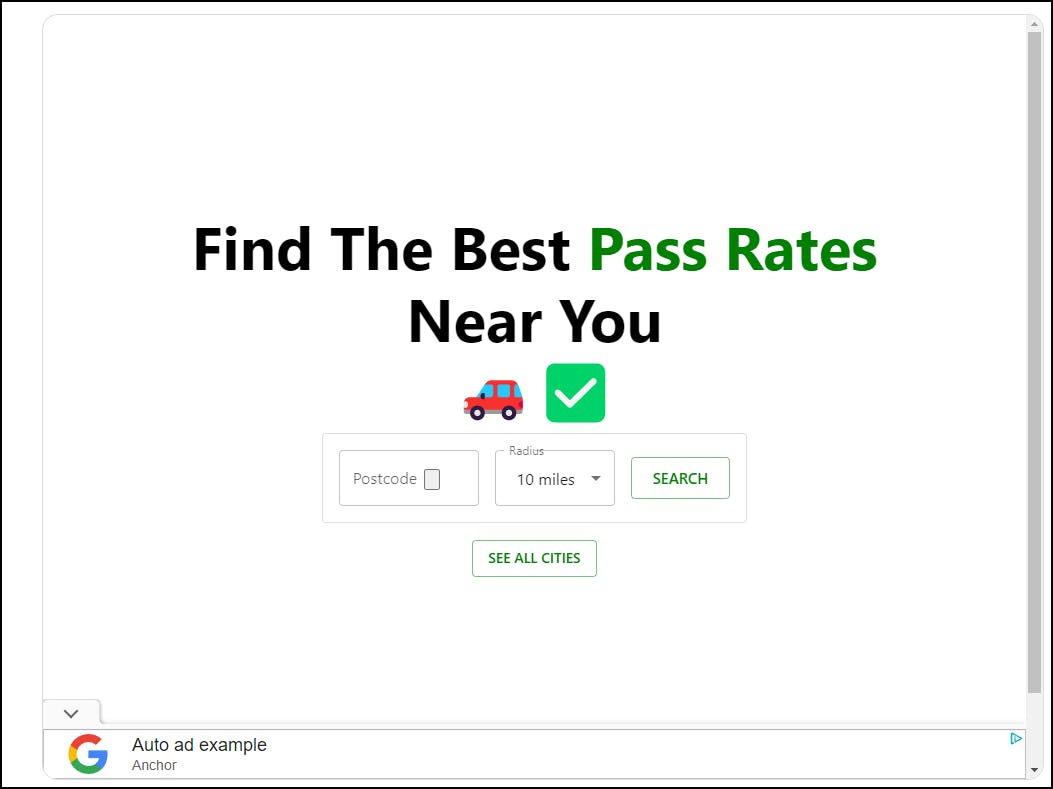
From there, select the "Auto ads" option to turn on automatic ad placement. Sometimes, the ads might not show up immediately, so try clicking "Apply to site" and coming back later to see if the ads have appeared. You should see some ad placeholders added to your site.
If you're not satisfied with the ad placement, you can always choose to manually place them on your site. Check out this guide to learn how.
It's important to note that ads won't appear immediately after adding the code to your website. Google AdSense will review your website to ensure that it meets its policies, which can take up to two weeks.
Conclusion
And there we have it! Firstly, well done for getting through this whole process. Building an entire application and ensuring it's production-ready is no easy feat, so congratulations on getting through this entire guide! Let's cover what we've done:
Built a website using public data
Added a sitemap and robots.txt for SEO
Added PWA support
Deployed the website using Vercel
Added our own domain name
Added our own email address for our domain
Added support for Twitter and Facebook cards
Measured website performance using Google Analytics
Measured SEO using Google Search Console
Monitised the website using Google AdSense.
That is a lot!
You can find all the code used in this post in my repo here. As well, you can find a live version of the application we built here.
Till next time!