Creating a Project Using Public Data for Fun and Profit: Part 1
How to use public data to build a Next.js app to help you land your next job, and maybe make some money - part 1

Full Stack Developer and Architect. Specialising in Java with Spring Boot, and React with Next.js. Passionate about building cloud-native applications following DDD.
In this post, we'll explore how to create an engaging website using public data that you can monetize and use to impress potential employers. You'll learn the benefits of developing a personal project using public data and follow an example of building an app from scratch to deployment.
Throughout this blog, we'll walk through a step-by-step guide on how to build a website that allows users to search for driving test centres near them and show which centres have the best pass rates. We'll be using the UK Government's public data on driving test centre pass rates. I built this app because I'm learning to drive, and I wanted to know which test centre would give me the best chance of passing.
This will be a big post, so I've split it into 4 parts. The other parts will be coming soon!
In this part, we will cover:
Setting up the initial project
Retrieving and formatting the public test centre data
Creating and styling the landing page
All the code referenced in this post can be found in my repo here. As well, you can find a live version of the application we build here.
Why Should I Create My Own Personal Project?
Developers create personal projects for several reasons, including showcasing their skills to potential employers, learning new technologies, having fun, and making a profit. Often, a project can fulfil all these reasons simultaneously. Building a personal project is one of the best ways to create a portfolio that can help you break into the software industry and land a job.
Why Should I Use Public Data?
If you're looking for project ideas, public data can be an excellent source of inspiration. Public data is easy to obtain, it's free, and when combined with other data, it can provide substantial value to users. Even presenting data in a user-friendly format can be a significant win, considering that public data is often not presented this way.
Some examples of sources of public data are government and video games. For example, you can find health data, such as the number of vaccinations in England, on the UK Government's Coronavirus Dashboard here. Another example is tax data, such as council tax data, which can be found here. Alternatively, you can find video game data, such as the World of Warcraft API or the PokéAPI for Pokémon.
You could also scrape data from websites if they don't offer a nice way to get their data, depending on their data usage policies, however, that deserves its own separate post. If you're interested in web scraping, you can find a tutorial here from FreeCodeCamp.
There are many other sources of public data, and the key is to choose data that interests you or solves a particular problem you're facing. That way you're much more likely to stick with the project!
The Requirements
Before we begin, let's set out the requirements:
The user can see the best driving test centres around them, based on their postcode.
The user can see the best driving test centres around popular cities.
The user can see the Google Reviews rating for each test centre.
The user can easily see where the test centre is located on Google Maps.
Set Up
For this application, we'll use Next.js as the framework and Material UI for the design. If you haven't used Next.js before, don't worry. Most of it will be clear if you've used React before.
I chose Next.js for its static site generation, which makes it lightning-fast. Since most of the data we use here is not dynamic, we can generate our pages at build time. This not only makes the application load extremely fast, but it's also good for SEO (which we'll cover later), which is crucial if we want to monetize our app later. It's also easy to host, as we'll see later.
Throughout this post, we'll explore how we can use Next.js for static site generation. However, you can read more about Next.js here.
To start, let's initialise our project:
> npx create-next-app@latest --ts
Once completed, we can start up our application by running:
npm run dev
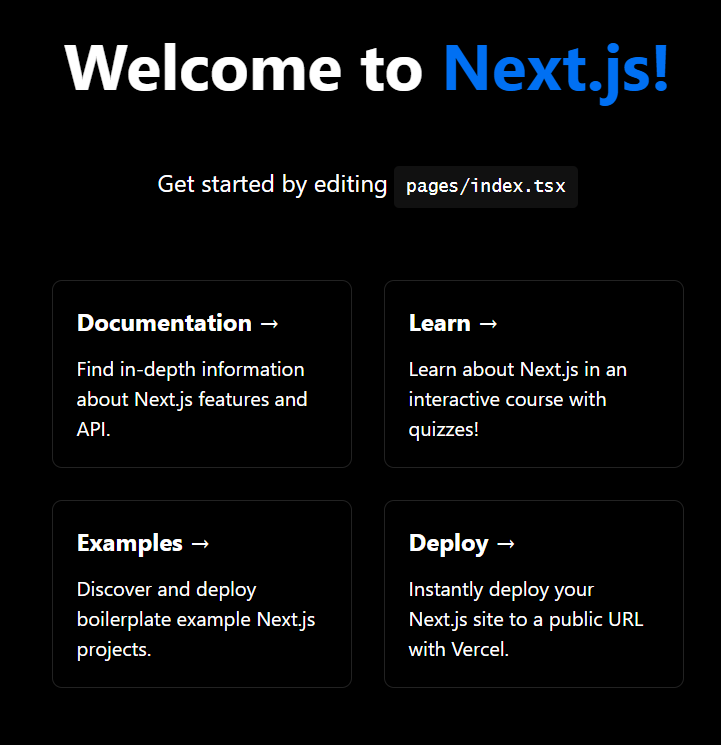
Opening localhost:3000 should then show us the Next.js example page:
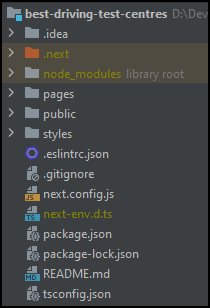
Your directory structure should look like this:

Getting the Public Data
Step 1: Acquiring Test Centre Data
Please note that in this section I'll be deliberately brief on the details. This is partly because the point of this post isn't to copy what I did entirely, but rather to provide inspiration, but also because I don't want this post to be any longer than it needs to be. I leave the massaging of data as an exercise for the reader.
To build our web app, we first need to obtain data on the driving test centres. This data can be downloaded from the UK government's page on driving test pass rates, which can be found here. Specifically, we need the "Car pass rates by gender, month and test centre" document which provides the total pass rate for men and women for each driving test centre per year.
This document contains a tab for each year, with a record of the total pass rate for all men and women that year for each driving test centre.

As an example, we can see that Aberdeen North had a total pass rate of 48.2% for the year 2022-23.
Once you have this data, you can use your preferred scripting language to extract a list of each test centre name with its corresponding total pass rate.
Step 2: Retrieving Test Centre Location Data
In order to calculate the distance between the user and each test centre, we need to determine the location of each test centre. One way to accomplish this is by using the Google Maps Places API. While the API is not free, it offers 28,500 free map-loads per month, which should be more than sufficient for our needs.
To use the Places API, you need to obtain your own API key, which you can do by following the instructions provided here.
We'll be using two endpoints of the Places API - findplacefromtext and details. These endpoints return the following fields:
geometry: The longitude and latitude of the test centre location.rating: The Google reviews rating for the location.user_ratings_total: The total number of reviews left for the location.url: The link to the location in Google Maps.
We can use the findplacefromtext endpoint to search for our test centres by name and retrieve a list of candidates with their corresponding name and place ID. For example, when searching for the Mill Hill (London) driving test centre, you can query the following URL:
https://maps.googleapis.com/maps/api/place/findplacefromtext/json?input=Mill%20Hill%20(London)%20Driving%20Test%20Centre&inputtype=textquery&key=<YOUR API KEY>&locationbias=ipbias&fields=name,place_id
This query returns:
{
  "candidates": [
    {
      "name": "Mill Hill Driving Test Centre",
      "place_id": "ChIJXdhrutoWdkgRh_OPEmlGwmc"
    }
  ],
  "status": "OK"
}
Next, we can use the place ID to retrieve all the details about that test centre using the details endpoint. For example, you can query the following URL to retrieve details for the Mill Hill (London) driving test centre:
https://maps.googleapis.com/maps/api/place/details/json?place_id=ChIJXdhrutoWdkgRh_OPEmlGwmc&key=<YOUR API KEY>&fields=geometry,rating,url,user_ratings_total
This query returns:
{
  "html_attributions": [],
  "result": {
    "geometry": {
      "location": {
        "lat": 51.6103168,
        "lng": -0.2469914999999999
      },
      "viewport": {
        "northeast": {
          "lat": 51.6115767802915,
          "lng": -0.2457076697084979
        },
        "southwest": {
          "lat": 51.6088788197085,
          "lng": -0.248405630291502
        }
      }
    },
    "rating": 4.7,
    "url": "https://maps.google.com/?cid=7476615748485378951",
    "user_ratings_total": 350
  },
  "status": "OK"
}
For test centres where I got more than one candidate I hand-picked the right one - however, you could write your own algorithm to programmatically figure this out.
Step 3: Combining the Data
We need to combine the data we collected earlier to create a list of all the test centres. We'll include their name, pass rate, lat long, rating, number of ratings, and the Google Maps URL in a JSON file. Let's save this file in a directory called testcentres in the root directory.
Here's an example of what the JSON file should look like:
[
  {
    "name": "Aberdeen North",
    "passRate": "57.3",
    "mapDetails": {
      "lat": 57.1856443,
      "lng": -2.0964023,
      "rating": 4.1,
      "url": "https://maps.google.com/?cid=5779616227159057902",
      "userRatingsTotal": 7
    }
  },
  {
    "name": "Aberdeen South (Cove)",
    "passRate": "64.5",
    "mapDetails": {
      "lat": 57.0884979,
      "lng": -2.1077442,
      "rating": 4.3,
      "url": "https://maps.google.com/?cid=10499189161470180622",
      "userRatingsTotal": 19
    }
  },
  ...
]
Creating the Landing Page
In this section, we'll start creating our landing page.
Step 1: Install the Necessary NPM Packages
We will need to install both Material UI and Emotion:
> npm install @mui/material
> npm install @mui/icons-material
> npm install @emotion/react
> npm install @emotion/styled
Step 2: Style the Landing Page
Next, we'll update our _app.tsx file and index.tsx file to use Material UI components and styles. The changes to _app.tsx will apply our Material UI theme and our Flexbox styling to all pages.
Replace _app.tsx with the following:
import '../styles/globals.css'
import type {AppProps} from 'next/app'
import {Container, createTheme, ThemeProvider} from "@mui/material";
import Head from "next/head";
import Box from "@mui/material/Box";

const theme = createTheme({
    typography: {
        fontFamily: [
            "-apple-system", "BlinkMacSystemFont", "Segoe UI", "Roboto", "Oxygen", "Ubuntu", "Cantarell", "Fira Sans", "Droid Sans", "Helvetica Neue", "sans-serif"
        ].join(",")
    },
    palette: {
        primary: {
            light: '#6985ff',
            main: '#008000',
            dark: '#0031c3',
            contrastText: '#ffffff',
        },
        secondary: {
            light: '#9fcfff',
            main: '#689eff',
            dark: '#2770cb',
            contrastText: '#ffffff',
        },
    },
});

function MyApp({Component, pageProps}: AppProps) {
    return <>
        <Head>
            <title>Best Driving Test Pass Rates Near Me</title>
        </Head>
        <ThemeProvider theme={theme}>
            <Box sx={{display: 'flex', flexDirection: 'column', minHeight: '100vh'}}>
                <Container fixed sx={{display: 'flex', flex: 1, flexDirection: 'column'}}>
                    <Component {...pageProps} />
                </Container>
            </Box>
        </ThemeProvider>
    </>
}

export default MyApp
Replace index.tsx with the following:
import type {NextPage} from 'next'
import styles from '../styles/Home.module.css'
import {Typography} from "@mui/material";

const Home: NextPage = () => {

  return (
          <div className={styles.content}>
            <div style={{display: 'flex'}}>
              <Typography variant="h2" sx={{m: 1, fontWeight: 'bold'}}>Find The Best <span
                      style={{color: 'green'}}>Pass Rates</span> Near You <br/>🚗✅</Typography>
            </div>
          </div>
  )
}

export default Home
We then need to change the Home.modules.css file. This file will contain specific styles for our landing page. Replace it with the following:
.container {
  padding: 0 2rem;
}

.app {
  display: flex;
  flex: 1;
  text-align: center;
}

.content {
  text-align: center;
  display: flex;
  flex: 1;
  flex-direction: column;
  align-items: center;
  justify-content: center;
  font-size: calc(10px + 2vmin);
}

.main {
  min-height: 100vh;
  padding: 4rem 0;
  flex: 1;
  display: flex;
  flex-direction: column;
  justify-content: center;
  align-items: center;
}
Finally, we need to change the globals.css file. This file will contain global styles that will be applied to all pages. Replace it with the following:
html,
body {
  padding: 0;
  margin: 0;
  font-family: -apple-system, BlinkMacSystemFont, Segoe UI, Roboto, Oxygen,
  Ubuntu, Cantarell, Fira Sans, Droid Sans, Helvetica Neue, sans-serif;
}

* {
  box-sizing: border-box;
}
You can also delete the api folder and hello.ts file inside of it, as we will not be creating an API for this application.
Run npm run dev and navigate to localhost:3000. You will now see our styled landing page.

Showing the Nearest Test Centres for a Specific Postcode
One of our main requirements is to enable users to view the best driving test centres in their area, based on their postcode. To achieve this, we need to find the nearest test centres based on a given postcode and display the results on a dedicated web page.
Step 1: Create a Function To Get Location Data By Postcode
To do this, we can use postcodes.io, an open-source postcode and geolocation API for the UK, to find the nearest test centres based on a postcode. Postcodes.io API provides us with approximate longitude and latitude data based on a postcode, and vice versa. It even offers autocomplete data for partial postcodes, which we'll use later.
To start, we'll define a file that contains all the logic to connect to postcodes.io API and gets the location data for a specific postcode.
We'll create a new directory called api and a new file called PostcodesAPI.ts inside it, which should contain the following:
import LongLat from "./LongLat";

const baseUrl = 'https://api.postcodes.io/postcodes/';

export async function getLongLatFromPostcode(postcode: string) {
  const response = await getPostcodeResponse(postcode);
  if (!response) return;
  return response.result;
}

const getPostcodeResponse = async (postcode: string): Promise<PostcodeResponseDTO | null> => {
  return await fetch(`${baseUrl}${postcode}`, {
    headers: {
      'Content-Type': 'application/json',
      'Accept': 'application/json'
    }
  }).then(response => {
    return response.json();
  }).catch(error => {
    console.error(error);
    return null;
  })
}

interface PostcodeResponseDTO {
    result: LongLat
}
Next, we'll create a new directory called lib and add a file called LongLat.ts. This file contains the following code:
export default interface LongLat {
    longitude: number
    latitude: number
}
Step 2: Create a Function To Get Test Centre Data
We need to create a function that returns the list of objects from the testcentres.json file that we generated earlier.
Create a new file inside the lib directory called testcentres.ts containing the following:
import path from "path";
import fs from "fs";
import {TestCentre} from "./TestCentre";

const directory = path.join(process.cwd(), 'testcentres');

export function getTestCentres() {
    const fullPath = path.join(directory, `testcentres.json`);
    const testCentres : TestCentre[] = JSON.parse(fs.readFileSync(fullPath, 'utf8'));
    return testCentres;
}
We also need to create another file called TestCentre.ts, which contains the following:
interface MapDetails {
    lat: number
    lng: number
    rating: number
    url: string
    userRatingsTotal: number
}

export interface TestCentre {
    name: string
    passRate: string
    mapDetails: MapDetails
}

export interface TestCentreWithDistance extends TestCentre {
    distance: number
}
Step 3: Create A Page to Show Results
Now, we can create a new page called pass-rates.tsx in the pages directory. This will display the details of all test centres nearest to the supplied postcode, within the supplied radius.
The pass-rates.tsx file should contain the following code:
import React, {useEffect} from "react";
import {useRouter} from 'next/router'
import Head from "next/head";
import {Typography} from "@mui/material";

import {getLongLatFromPostcode} from "../api/PostcodesAPI";
import LongLat from "../lib/LongLat";
import {getTestCentres} from "../lib/testcentres";
import {TestCentre, TestCentreWithDistance} from "../lib/TestCentre";

export async function getStaticProps() {
    const testCentres = getTestCentres();
    return {
        props: {
            testCentres
        },
    };
}

function getTestCentresWithinRadius(usersLongLat: LongLat, radius: number, testCentres: TestCentre[]) : TestCentreWithDistance[] {
    return testCentres.flatMap(centre => {
        const distance = getDistanceFromLatLon(usersLongLat.latitude, usersLongLat.longitude, centre.mapDetails.lat, centre.mapDetails.lng);
        if(distance > radius) return [];
        const centreWithDistance = structuredClone(centre) as TestCentreWithDistance;
        centreWithDistance.distance = distance;
        return centreWithDistance;
    })
}

function getDistanceFromLatLon(lat1: number, lon1: number, lat2: number, lon2: number): number {
    const R = 6371; // Radius of the earth in km
    const dLat = deg2rad(lat2 - lat1);  // deg2rad below
    const dLon = deg2rad(lon2 - lon1);
    const a =
        Math.sin(dLat / 2) * Math.sin(dLat / 2) +
        Math.cos(deg2rad(lat1)) * Math.cos(deg2rad(lat2)) *
        Math.sin(dLon / 2) * Math.sin(dLon / 2);
    const c = 2 * Math.atan2(Math.sqrt(a), Math.sqrt(1 - a));
    return (R * c) * 0.62137119; // Convert distance from km to miles
}

function deg2rad(deg: number): number {
    return deg * (Math.PI / 180);
}

export default function Results({testCentres}:any) {
    const router = useRouter()
    const {postcode, radius} = router.query;
    const [results, setResults] = React.useState<TestCentreWithDistance[]>([]);

    const getResults = async () => {
        if (!postcode) return;
        if (!radius) return;
        const usersLongLat = await getLongLatFromPostcode(postcode as string);
        if (!usersLongLat) return;

        setResults(getTestCentresWithinRadius(usersLongLat, parseInt(radius as string), testCentres));
    }

    useEffect(() => {
        getResults();
    }, [postcode, radius])


    return (
        <>
            <Head>
                <meta charSet="utf-8"/>
                <title>Best Driving Test Pass Rates Near Me - Pass Rates</title>
                <meta name="description" content={`Shows the latest pass rates for driving test centres near ${postcode} within a ${radius} mile radius`}/>
            </Head>

            <Typography variant="h6">Test Centres within {radius} mile radius of {postcode}</Typography>
            <ul>

            {
                results.map(
                    r => <li key={r.name}>Name: {r.name}, Distance: {r.distance}, Rating: {r.mapDetails.rating}⭐ ({r.mapDetails.userRatingsTotal} reviews), mapUrl: {r.mapDetails.url}</li>
                )
            }
            </ul>

        </>
    );
}
Let's go through in detail what is happening here.
To get the supplied postcode and radius we use Next.js's Router in the line const {postcode, radius} = router.query. This reads the query parameters from the URL and copies them into parameters with the same name.
For example, if the URL is http://localhost:3000/pass-rates?postcode=NG16JX&radius=10, then the postcode variable will be set to NG16JX, and the radius variable will be set to 10.
To get the test centre data we use the function we defined in the previous step, getTestCentres. We use this in combination with Next.js's getStaticProps function. getStaticProps is a special function that is run when the page is statically generated at build time. That means the test centre's data is already loaded before a user loads the page, which drastically helps speed up the rendering time for a page. You can read more about this here.
To know which test centres are within the specified radius we first calculate the latitude and longitude of the specified postcode by calling the getLongLatFromPostcode function we defined earlier. Using the longitude and latitude, along with the radius and all the test centre data, we calculate the distance between the specified postcode and each test centre using the Haversine formula. We then convert that distance into miles (as our radius measurement is miles). We then use this distance to filter out any test centre with a distance greater than the specified radius.
Finally, we display all the results in a list.
We can now navigate to the /pass-rates page and pass in a postcode and a radius. E.g. to find all test centres within a 10-mile radius of Nottingham we can navigate to: http://localhost:3000/pass-rates?postcode=NG16JX&radius=10
Which will show us a page will all the test centres within 10 miles of Nottingham.

Try it out with your own postcode!
Step 4: Showing the Results as a Table
While our /pass-rates page does show the correct results, it's not very pretty. Let's use a table instead to render the data.
To do this, let's add a new file ResultsTable.tsx to our components directory, which should contain the following:
import * as React from 'react';
import Box from '@mui/material/Box';
import Table from '@mui/material/Table';
import TableBody from '@mui/material/TableBody';
import TableCell from '@mui/material/TableCell';
import TableContainer from '@mui/material/TableContainer';
import TableHead from '@mui/material/TableHead';
import TableRow from '@mui/material/TableRow';
import TableSortLabel from '@mui/material/TableSortLabel';
import Paper from '@mui/material/Paper';
import {visuallyHidden} from '@mui/utils';
import {TestCentreWithDistance} from "../lib/TestCentre";
import {Tooltip} from "@mui/material";
import HelpIcon from '@mui/icons-material/HelpOutline';
import MapIcon from '@mui/icons-material/Map';

interface Data {
    name: string
    passRate: number
    rating: string
    distance: number
    mapURL: string
}

function descendingComparator<T>(a: T, b: T, orderBy: keyof T) {
    if (b[orderBy] < a[orderBy]) {
        return -1;
    }
    if (b[orderBy] > a[orderBy]) {
        return 1;
    }
    return 0;
}

type Order = 'asc' | 'desc';

function getComparator<Key extends keyof any>(
    order: Order,
    orderBy: Key,
): (
    a: { [key in Key]: number | string },
    b: { [key in Key]: number | string },
) => number {
    return order === 'desc'
        ? (a, b) => descendingComparator(a, b, orderBy)
        : (a, b) => -descendingComparator(a, b, orderBy);
}

// This method is created for cross-browser compatibility, if you don't
// need to support IE11, you can use Array.prototype.sort() directly
function stableSort<T>(array: readonly T[], comparator: (a: T, b: T) => number) {
    const stabilizedThis = array.map((el, index) => [el, index] as [T, number]);
    stabilizedThis.sort((a, b) => {
        const order = comparator(a[0], b[0]);
        if (order !== 0) {
            return order;
        }
        return a[1] - b[1];
    });
    return stabilizedThis.map((el) => el[0]);
}

interface HeadCell {
    disablePadding: boolean;
    id: keyof Data;
    label: string;
    numeric: boolean;
}

const headCells: readonly HeadCell[] = [
    {
        id: 'name',
        numeric: false,
        disablePadding: true,
        label: 'Test Centre',
    },
    {
        id: 'passRate',
        numeric: true,
        disablePadding: true,
        label: 'Pass Rate',
    },
    {
        id: 'rating',
        numeric: true,
        disablePadding: true,
        label: 'Rating'
    },
    {
        id: 'distance',
        numeric: true,
        disablePadding: true,
        label: 'Distance (miles)',
    }
];

interface EnhancedTableProps {
    onRequestSort: (event: React.MouseEvent<unknown>, property: keyof Data) => void;
    order: Order;
    orderBy: string;
    rowCount: number;
}

function EnhancedTableHead(props: EnhancedTableProps) {
    const {order, orderBy, onRequestSort} =
        props;
    const createSortHandler =
        (property: keyof Data) => (event: React.MouseEvent<unknown>) => {
            onRequestSort(event, property);
        };

    return (
        <TableHead>
            <TableRow>
                {headCells.map((headCell) =>
                    (<TableCell
                            key={headCell.id}
                            align={headCell.numeric ? 'right' : 'left'}
                            sortDirection={orderBy === headCell.id ? order : false}
                        >
                            <TableSortLabel
                                active={orderBy === headCell.id}
                                direction={orderBy === headCell.id ? order : 'asc'}
                                onClick={createSortHandler(headCell.id)}
                            >
                                {headCell.label !== 'Rating' ?
                                    headCell.label : <>{'Rating'} <Tooltip
                                        title="Ratings from Google"><HelpIcon sx={{ml: 1}}/></Tooltip></>}
                                {orderBy === headCell.id ? (
                                    <Box component="span" sx={visuallyHidden}>
                                        {order === 'desc' ? 'sorted descending' : 'sorted ascending'}
                                    </Box>
                                ) : null}
                            </TableSortLabel>
                        </TableCell>
                    ))}
            </TableRow>
        </TableHead>
    );
}

interface ResultsTableProps {
    results: TestCentreWithDistance[]
}

export default function ResultsTable({results}: ResultsTableProps) {
    const [order, setOrder] = React.useState<Order>('desc');
    const [orderBy, setOrderBy] = React.useState<keyof Data>('passRate');

    const r = results.map(result => {
        return {
            name: result.name, passRate: result.passRate,
            rating: result.mapDetails.rating ? `${result.mapDetails.rating}⭐ (${result.mapDetails.userRatingsTotal} reviews)` : ``,
            mapURL: result.mapDetails.url,
            distance: result.distance
        };
    })

    const handleRequestSort = (
        event: React.MouseEvent<unknown>,
        property: keyof Data,
    ) => {
        const isAsc = orderBy === property && order === 'asc';
        setOrder(isAsc ? 'desc' : 'asc');
        setOrderBy(property);
    };

    return (
        <>
            <TableContainer component={Paper}>
                <Table
                    size={"medium"}
                    aria-labelledby="tableTitle"
                    style={{ tableLayout: 'auto' }}
                    padding={'normal'}

                >
                    <EnhancedTableHead
                        order={order}
                        orderBy={orderBy}
                        onRequestSort={handleRequestSort}
                        rowCount={results.length}
                    />
                    <TableBody>
                        {/* if you don't need to support IE11, you can replace the `stableSort` call with:
              rows.slice().sort(getComparator(order, orderBy)) */}
                        {stableSort(r, getComparator(order, orderBy))
                            .map((row) => {
                                return (
                                    <TableRow
                                        hover
                                        tabIndex={-1}
                                        key={row.name}
                                    >
                                        <TableCell>{row.name}<MapIcon onClick={() => window.open(row.mapURL)}/></TableCell>
                                        <TableCell align="right">{row.passRate}%</TableCell>
                                        <TableCell align="right">{row.rating}</TableCell>
                                        <TableCell
                                            align="right">{Math.round((row.distance + Number.EPSILON) * 100) / 100}</TableCell>
                                    </TableRow>
                                );
                            })}
                    </TableBody>
                </Table>
            </TableContainer>
        </>
    );
}
There's a lot of code in this file, however, a lot of it is copied from the "Sorting & Selecting" example given for tables in Material UI here.
The most important section to focus on is the tsx returned from the function, showing how our table is rendered and with what cells and rows.
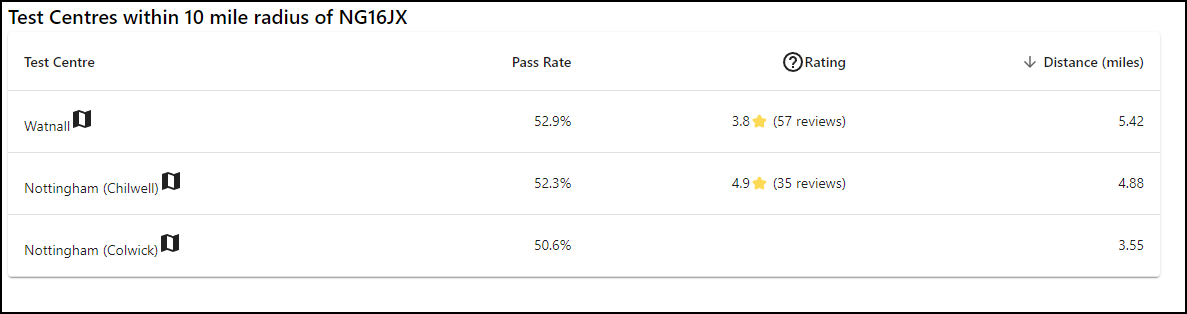
The table contains functionality for the user to sort by each column, and each column contains a map icon, linking the user to the test centre on Google Maps.
Navigating to http://localhost:3000/pass-rates?postcode=NG16JX&radius=10 now shows us a table with the same results as before.
Conclusion
This completes part 1!
Let's review what we've done here:
Set up the initial project
Retrieved and formatted the public test centre data
Created and styled the landing page
You can find all the code used in this post in my repo here. As well, you can find a live version of the application we built here.
Look out for part 2, where we'll be adding search functionality and displaying the nearest test centres for each city!
Updated: Part 2 is now available. Read it here.
Till next time!